Convert L & R Audio Tracks in Protools to Stereo
Do You Know These Stereo Width Tips And Tricks?
Although we track more and more in stereo, there is still a lot of what we do that is in mono. If we want to give mono content some width, what do we do? In this article, we are going to look at a range of techniques to be able to add some width to mono content.
So What To Do?
What a lot of people do is dive for the stereo width plug-ins or wash synth and guitar sounds in wide stereo chorus in the hope of producing a wider stereo mix, because wide is good, but if you aren't careful all that will happen is that you will end up with a wider stereo mush.
You could reduce most of the components down to mono and pan them across the stereo image so each of your instruments has its own place in the image, it may sound like a contradiction but your mix can end up with a wider perceived stereo balance and elements will stand out more easily.
The best way forward is somewhere in between. There are some sounds that work well in mono like drum sounds. I think the sub-title for this series is the overused phrase "little is more".
If you pull in the width of a lot of your stereo sounds then those that are left will have room to breathe and the others will have a clear space to occupy in the stereo image of your mix. You will have also created the space in your mix for image enhancers and special effects to work clearly in your mix.
In this article, we are going to look at some solutions.
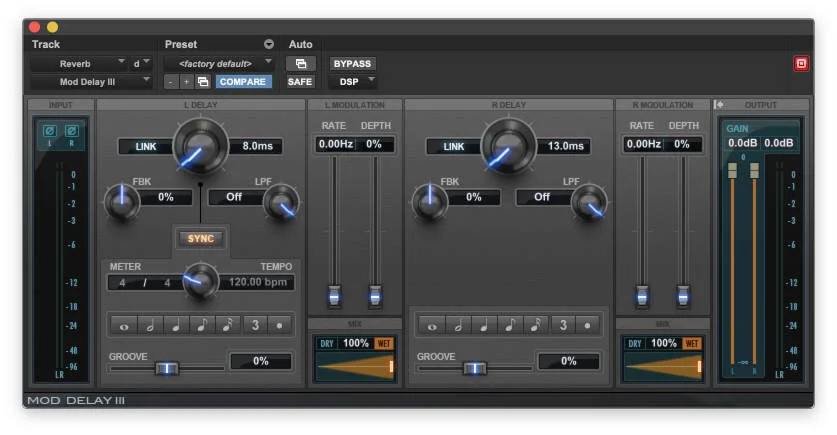
Using Small Delays - Option 1
Use a mono to stereo or stereo delay plug-in to introduce small delays in one or both sides. Don't go beyond a delay time of 15ms but be aware that delay is one of the main mechanisms that our hearing uses for sound location.
Try this effect on a kick drum and you will notice that for very small delays that the drum appears to come from the side with less delay because that is where the sound is coming from first. Once you get beyond 5ms of delay things are less obvious but go much beyond 15 ms and you will get a distinct 2nd beat, which isn't desirable.
To help the steering effect try reducing the level of the undelayed side and use the mix control to make the effect even more subtle.
Experiment with keeping the stereo width pretty tight so as to localise that sound to a particular position in the stereo image.
Using Small Delays - Option 2
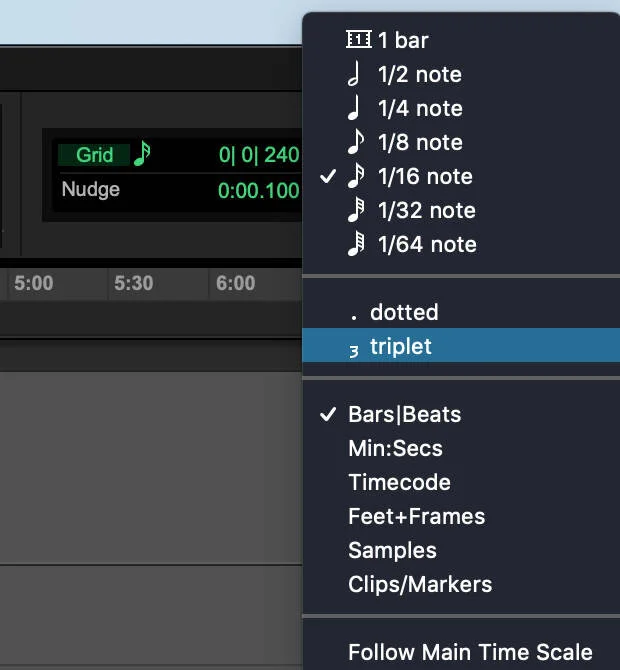
Now here is a trick that doesn't even need a plug-in but is something I could have never done when I was working with tape.
Take a mono track, duplicate it so you have two identical tracks and then use the Nudge feature to offset the copied track a 64th note triplet. The effect is stunning, a one-dimensional mono track suddenly has come alive. It is subtle yet very effective and doesn't cost you processing power using a plug-in. Try it on guitars, both acoustic and electric. Even try it on vocals, especially for fattening up backing vocals.
Phase Tricks
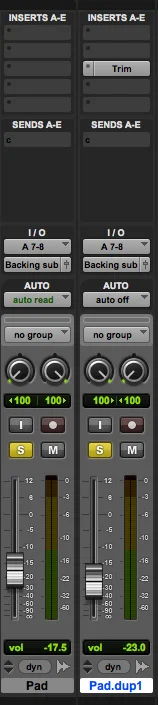
One of the ways of making an existing stereo signal appear wider and even appear to be coming from outside the stereo speakers is to take a little of the left channel, reverse the phase and mix it into the right channel and vice versa.
Duplicate the track you want to process. Then if your DAW has a phase invert (polarity) option, use that to invert the phase of one of the tracks. In Pro Tools, you will need to insert a Trim plugin on the duplicate track and press the Phase Invert button or use the AudioSuite Invert plug-in that you will find in the Other group in the AudioSuite menu and create an identical set of regions that are phase inverted.
Whichever way you do it, flip the pan controls of the duplicate track so left goes to right and right goes to left.
Finally, introduce a small amount of the inverted track and listen as the track gets wider. Push it too far and you will get a hole in the middle and it will also play havoc with the mono compatibility.
Split EQ
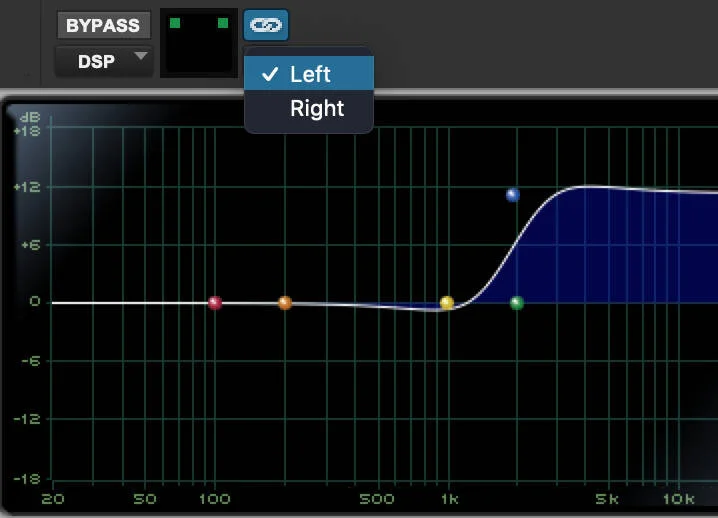
Most stereo EQ plug-ins will allow you to split the EQ so you can have different EQ settings on one side to the other.
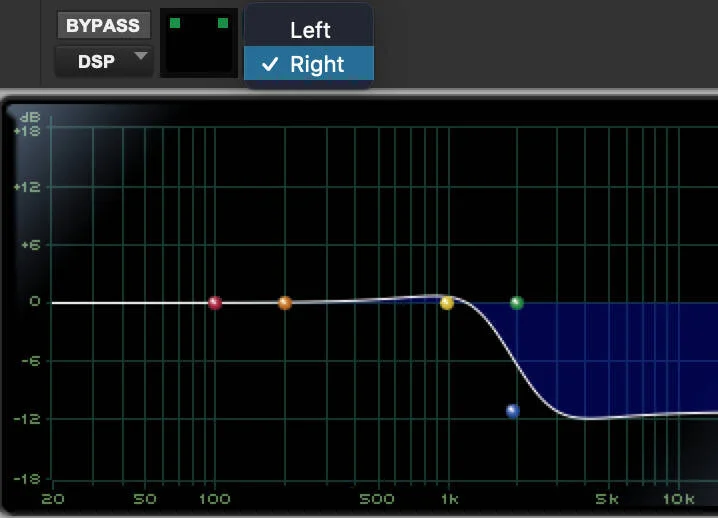
These two screenshots show the Pro Tools stock EQ plug-in. You will need to use a multiple-mono instance of the plugin and de-select the stereo link button and then set matching HF cut and boost settings on the left and right sides. However, the EQ3 won't display both sides simultaneously.
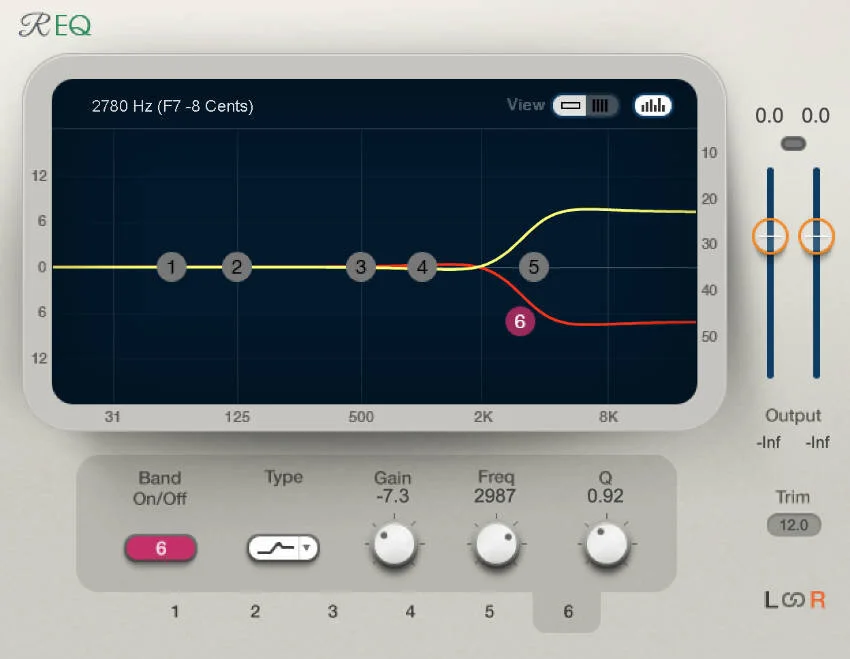
The Waves Renaissance EQ is an example of an EQ plug-in that does show both sides simultaneously, within the plugin, making the set-up much easier. In Pro Tools, you can use a multichannel instance and then in the plugin, turn off the channel linking in the bottom right-hand corner of the plugin.
This produces a very subtle width enhancement and providing you have matching opposites this trick will be completely mono-compatible, as the 2 effects will cancel each other out. Alternatively, you can duplicate the tracks and have an EQ plug-in on each track.
The EQ doesn't need to match for this to work, although the more different the EQ is between left and right channels the less mono-compatible the process will be. In an article, Using The Warm Audio WA273-EQ To Create A Stereo Image From A Mono Signal - We Show You How James Ivey demonstrated how this trick can be used with hardware EQs as well as Universal Audio plugins like the Neve 1073 plugin.
MS EQ
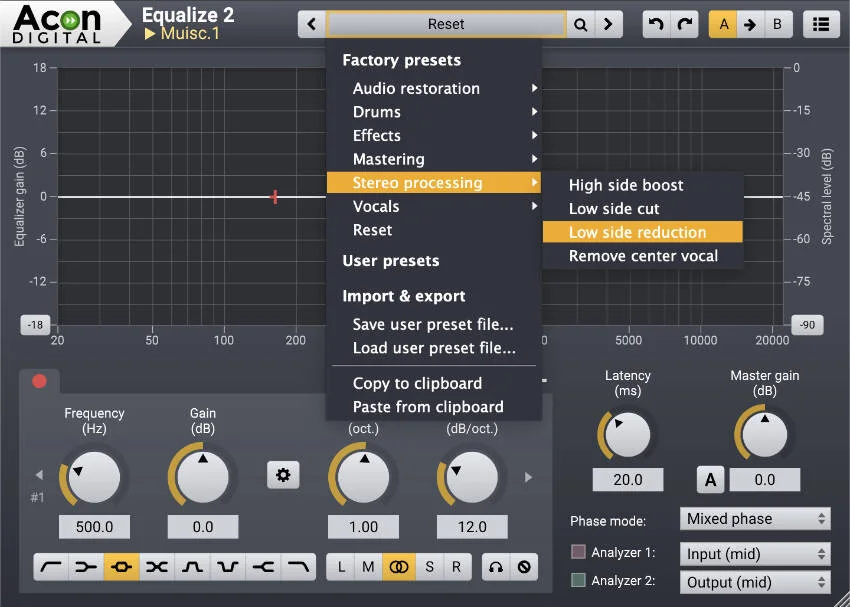
Another variation of using different EQ settings on the left & right channels is to convert the Left & Right into MS and then EQ the Side (difference between left and right) differently to the M (left and right added together) then decode the MS back to left and right. This is a trick used by mastering engineers to EQ the stereo part of the signal but leave the mono components alone.
An example of an EQ plugin that offers EQ processing is Equalize from Acon Digital. Mike demonstrates this in his Rreview video of Equalize, jump to 10'48" to watch Mike's demo.
But what if you don't have a plugin that has a Mid/Side option. All is not lost.
It is also possible to the MS encode/decode with just aux tracks. The maths for MS encoding are simple L+R=M, L-R=S and decoding L=M+S and R=M-S.
-
To use these formulae, in your DAW, take the Left and Right channels and mono them to create L+R, which gives the M channel.
-
On another track, take the same L & R and mono them but invert the phase of one channel. In Pro Tools, insert a Trim plug-in with a phase Invert enabled on one side. This will provide the S channel, which is L-R.
-
Route the L+R into one side of an EQ plug-in and the L-R to the other side.
-
To get back to left and right, take the output of the plug-in and route the M channel to a mono aux track so it is panned centre across a stereo mix
-
Then route the S channel output through a stereo aux track with a phase invert only on one side and pan hard left & right to the same stereo mix as the mono channel.
-
OK, it isn't simple but once you have done it once, make a template session of it and you can quickly bring it into any session you need it on.
Julian Rodgers has created this Pro Tools session that he uses to help students understand how Mid/Side works. You can show the hidden tracks and follow the signal flow through the busses. The comments in the mixer should help.

Convolution Plugins
Here is a different use for impulse response plugins. Take a mono source signal, buss it to two mono aux tracks, panned hard left and right and grouped for convenience and use a monophonic convolution reverb plug-in into both aux tracks.
Use the same relatively neutral guitar cabinet IR on both reverb plug-ins, invert the phase on one of the mono channels and away you go. This works well on Rhodes pianos, acoustic bass, both acoustic and electric guitars. It is important that the impulse responses are small space or cabinet IRs and not reverbs.
This creates the illusion that the original signal is in stereo, and not a monophonic source in a reverberant space (even a small one). The result is tight and dry, and when collapsed into mono, there is no residual room sound as the IRs should completely cancel out.
There is an excellent free convolution reverb that we have featured in the Convology XT plugin. You can also create your own impulse responses using the free MIsTool from Wave Arts.

Dedicated Stereo Enhancement Plugins
There are lods of dedicated stereo width plugins to look at like the Waves PS22 plug-in, which Mike uses sometimes on a vocal channel just to open it up a little.
Others include iZotope's Ozone mastering plug-in and the PSP Pseudo Stereo and Stereo Enhancer plug-ins from their stereo pack. For Pro Tools users there is the a stereo enhancer plug-in that comes bundled in every Pro Tools system and it is the AIR Stereo Width plug-in.

Mike Thornton has been working in the broadcast audio industry for all his working life, some 44 years. Mike has worked with Pro Tools since the mid-90s recording, editing and mixing documentaries, comedy and drama for both radio and TV as well as doing the occasional music project. He was the co-founder of Pro Tools Expert and is now COO of Production Expert Ltd.
Read More →
Convert L & R Audio Tracks in Protools to Stereo
Source: https://www.pro-tools-expert.com/production-expert-1/do-you-know-these-stereo-width-tips-and-tricks
0 Response to "Convert L & R Audio Tracks in Protools to Stereo"
Post a Comment